Photographing the Eiffel Tower is a dream for every traveler who arrives in Paris. But there’s a massive gap between snapping that generic, tourist-packed shot and capturing a truly special image. The good news is that with the right tips on timing, angles, and techniques, anyone—even with just a smartphone—can take breathtaking photos of the Iron Lady.
In this complete guide, you’ll discover the best photography spots, the ideal times for every type of light, composition tips, and everything you need to know to come home with the best photos from your Paris trip.
Why Is Photographing the Eiffel Tower So Challenging?
At first glance, it seems easy: the tower is huge and visible from practically every angle in the city. But precisely because of that, taking a great photo of the Eiffel Tower requires planning. The structure is tall and narrow, which creates framing challenges. The lighting changes dramatically throughout the day. And, of course, there’s always a crowd of tourists who might pop up in the background—or the foreground—of your shot.
Plus, there’s an important legal issue: the Eiffel Tower’s nighttime light show is protected by copyright. This means that photographs of the light spectacle for commercial purposes require authorization. For personal use on social media, the practice is widely tolerated, but it’s good to know this before selling your images.

Dica: Aproveite também para fazer estes passeios em Paris
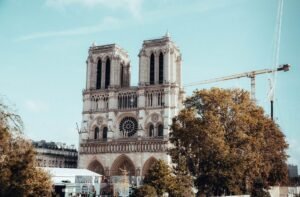
Tour pelo exterior da catedral de Notre Dame + Ingresso da cripta . Duração: 2 horas
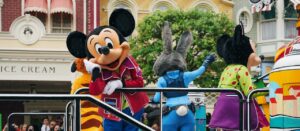
Disneyland Paris Duração: 3 horas ou mais
Passeio de barco pelo Sena. Duração: 1h
Ingresso do 3º andar da Torre Eiffel. Duração: 2 a 3 horas
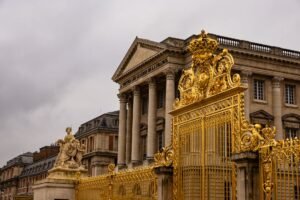
Ingresso do Palácio de Versalhes. Duração: 2 a 3 horas
Veja mais passeio em Paris aqui.
The Best Times to Photograph the Eiffel Tower
Timing is probably the most important factor for getting incredible photos of the Eiffel Tower. Natural light completely transforms the look of the structure throughout the day.
Golden Hour — The Magic Hour
The moments just after sunrise and just before sunset are called the “golden hour” by photographers, and for good reason. The light has a warm, soft tone, creating long, dramatic shadows that add depth and character to the Eiffel Tower. During the golden hour, the iron structure takes on shades of gold, copper, and amber that can transform any photo.
In the summer, sunset in Paris happens around 9:30-10 PM, which perfectly coincides with the start of the tower’s nighttime illumination. In the winter, it occurs around 5 PM, creating a spectacle of natural and artificial light simultaneously. To capture the golden hour, arrive at your chosen photography spot at least 30 minutes before the scheduled sunset time.
Blue Hour — The Twilight Blue
Right after sunset, for about 20 to 30 minutes, the sky takes on a deep blue hue that is absolutely magical in urban photographs. This is the so-called “blue hour.” At this moment, the tower’s artificial lights are already on, but the sky is still bright enough to create a perfect contrast and avoid the completely black background you get from photos taken in the middle of the night.
The blue hour is considered by many professional photographers to be the best time to photograph the Eiffel Tower. The combination of a vibrant blue sky with the golden lights of the structure creates compositions that look like they’re straight out of a professional color palette. This time passes quickly, so be ready with your gear already set up before it begins.
Sunrise — For the Early Birds
Those willing to wake up very early are rewarded with a valuable prize: the Eiffel Tower practically free of tourists. With the city still waking up, the squares and bridges around the tower are nearly deserted between 5 AM and 7 AM. The soft morning light creates delicate, atmospheric photographs. If there’s fog or mist—which happens often on Parisian mornings—the photos can take on an ethereal, cinematic look that’s the envy of any photographer.
Cloudy Day — Surprisingly Good
Many tourists are disappointed when Paris is overcast, but photographers know that a cloudy sky acts like a giant natural light diffuser. With clouds covering the sun, harsh shadows disappear, the lighting becomes even, and the tower appears with incredible detail throughout the frame. Plus, cloudy days tend to have fewer tourists in the vicinity, making it easier to find clean angles.

The Best Angles and Photography Spots
Choosing the right location is just as important as the timing. Paris offers dozens of different viewpoints for the Eiffel Tower, each with unique characteristics.
Trocadéro — The Irresistible Classic
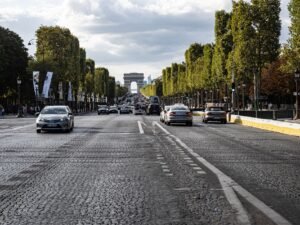
The Trocadéro Esplanade, across the Seine River from the tower, offers the most famous and iconic frontal view. This is where most postcard photos come from. The fountains of the Palais de Chaillot in the foreground, with the tower in the background, create a classic, balanced perspective. The problem: every other tourist knows this too, so the spot is always crowded.
To beat the crowds at Trocadéro, the most effective strategy is to arrive before 7 AM. Early in the morning, you can have the space practically to yourself. Another option is to go on rainy days, when most tourists are inside museums. Position yourself on the stairways of the Esplanade to have the fountains in the foreground and the tower perfectly framed in the background.
Pont de Bir-Hakeim — The Cinematic Angle
The Pont de Bir-Hakeim is, without a doubt, the most elegant and distinctive photography spot for the Eiffel Tower. This two-level bridge, with its Art Nouveau metal structure and ornate columns, creates unique perspectives where the tower appears framed by the bridge’s own architecture. The perspective with the metal columns in the foreground and the tower in the background is one of the most sought-after compositions by travel photographers.
The lower level of the bridge, accessible by stairs at the ends, offers even more dramatic perspectives. A little-known tip: position yourself in the center of the lower passage and use the columns as a frame for the tower. With a good lens or zoom on your phone, you can create a photo with depth and character that looks like it came straight out of a movie. The bridge also appears in several film productions, which gives photos taken here an almost automatic cinematic look.

Champ-de-Mars — The Base Shot
The Champ-de-Mars, the large park stretching out below the Eiffel Tower, is the ideal spot for photos that include the entire structure from ground to top. The closer you are to the tower, the more dramatic and imposing it will appear in the photo. By lying on the grass and pointing your camera upward, you can get extremely dynamic perspective shots where the tower seems to touch the sky.
For the classic shot with the whole tower and a more traditional perspective, position yourself about 400-500 meters from the base. This allows you to frame the entire structure without having to tilt the camera too much. The Champ-de-Mars is also great for people photos—the green grass as a base and the tower in the background create memorable portraits.
Pont d’Iéna — Straight to the Point
The bridge between Trocadéro and the Eiffel Tower is one of the most accessible and yet least explored viewpoints by passing tourists. From the Pont d’Iéna, you can photograph the base of the tower with the Seine River in the foreground. At dusk, the reflection of the lights on the water adds an extra layer of beauty to the composition. The perspective is different from conventional photos and brings a more intimate architectural element to the structure.
Sacré-Cœur and Montmartre — The Distant View
For those who want a photo that shows the Eiffel Tower in the context of the Parisian landscape, nothing beats the views from the top of Montmartre. From the front of the Sacré-Cœur Basilica or the streets of the bohemian neighborhood above, you can see the tower standing out on the horizon among the rooftops of Paris. With a telephoto lens (or maximum zoom on your phone), you can capture impressive frames where the tower floats above the city.
From the Tower Itself — The Inverted Perspective
Don’t forget that some of the best photos related to the Eiffel Tower are taken from it. From the second and third floors, you’ll have panoramic views of Paris that practically no other spot offers. The tower’s own metal structure appears in the foreground in photos taken from the intermediate floors, creating abstract and fascinating compositions with the city in the background. Remember to book your tickets in advance.
Technical Tips for Better Photos
Regardless of the equipment you use—whether a professional camera or a smartphone—some composition and setting techniques make a significant difference in the final result.
Composition: The Rule of Thirds
The rule of thirds is the most basic and effective composition concept in photography. Imagine dividing the frame into a 3×3 grid. Instead of centering the tower in the middle of the photo, place it on one of the vertical lines or at the intersection point of the lines. This creates more dynamic and visually interesting compositions. Most camera apps allow you to activate the thirds grid in the settings.
Use the Foreground
Photos that include elements of interest in the foreground—a fountain, flowers, the railing of the Bir-Hakeim bridge, people blurred in the foreground—create depth and tell a richer story than simply the tower against an empty sky. Always look for elements that can serve as a natural frame or context for your composition.
Night Mode and Long Exposure
For night photos, modern smartphones have a night mode that automatically compensates for the lack of light. But for truly professional results, use a tripod and set a long exposure (2 to 8 seconds). This allows you to capture light trails from cars on the streets, smooth out the movement of the Seine’s water, and reduce image noise—all at the same time. Cameras with manual mode (including some smartphones) allow you to adjust the exposure time manually.
Recommended Camera Settings
During the day, use a low ISO (100-400) to keep images sharp and noise-free. At sunset and during the golden hour, open the aperture (f/2.8 or f/4) to make the most of the available light. At night with a tripod, keep the ISO as low as possible (100-400) and use longer exposure times instead of increasing the ISO to avoid excessive grain. For photos of the city in the background, use a smaller aperture (f/8 to f/11) to ensure the entire scene is in sharp focus.

How to Photograph the Eiffel Tower with Your Smartphone
Most people visit Paris today with just their smartphone, and the cameras on modern phones are impressively capable. With the right tips, you can get high-quality photos even without a professional camera.
Use Optical Zoom, Not Digital
If your phone has multiple lenses (like most modern models), prefer using optical zoom (usually indicated as 2x or 3x) instead of doing digital zoom in editing. Digital zoom simply enlarges and crops the image, losing quality. Optical zoom uses a different lens and maintains all available resolution.
Lock Focus and Adjust Exposure
In challenging light conditions—like sunset or night—your phone’s autofocus can get lost. Tap the screen to select the focus point on the tower, then drag the sun icon that appears to adjust the exposure. For dramatic silhouettes, expose for the bright sky (sliding the sun up decreases exposure and darkens the foreground, creating the silhouette). To see the tower’s details, expose for the metal structure.
Editing on Your Phone
After taking the photos, basic editing can transform the result. Apps like Lightroom Mobile (free) and Snapseed allow you to adjust exposure, contrast, color temperature, and sharpness intuitively. For sunset photos, slightly accentuate the warm tones with the temperature control and increase contrast to make the silhouette more dramatic. For night photos, reduce noise (luminance) and slightly increase clarity to bring out the details of the metal structure.
The Eiffel Tower Light Show
Every night, starting at dusk, the Eiffel Tower puts on a light show that lasts 5 minutes at the top of every hour. During this show, the structure sparkles with thousands of white light flashes in a hypnotic dance that moves anyone seeing it for the first time. Photographing this moment is a technical challenge but produces absolutely spectacular results.
Settings for Photographing the Light Show
To capture the glow of the twinkling lights without them blurring, you need a relatively fast exposure time (1/60 of a second or faster) if you want to freeze the individual flashes. To create a light trail effect and capture the tower sparkling as a whole, use a longer exposure (4 to 8 seconds) with a tripod. This second approach produces a dramatic and unique visual effect. With a smartphone, night mode usually works well; for the trail effect, some phones allow you to manually control the exposure time.
Eiffel Tower Photos for Your Social Media
If the goal is to create content for Instagram, TikTok, or other social networks, some specific considerations help maximize the visual impact of your Eiffel Tower photos.
For portrait (vertical) format photos, the Eiffel Tower is a perfect subject—its elongated shape fills the 4:5 or 9:16 space well. Position yourself close to the base and tilt the camera slightly downward, then frame the tower using the top two-thirds of the frame. Photos of people in front of the tower, with the structure in the background, are always a hit on social media—position your friend or travel companion to the left or right of the tower, not directly in front of it, so both stand out.
For stories and reels, consider creating a sequence that goes from detail to the whole: start with a close-up of the metal structure, move to a medium perspective, and end with the full panoramic view. This progression creates an engaging visual narrative that works very well in short video formats.
Practical Tips for the Day of Photography
In addition to all the technical and location tips, some practical advice makes a difference when heading out to get the best Eiffel Tower photos.
Arrive early or late: Midday, between 10 AM and 4 PM, is the worst time both for light (harsh sun and ugly shadows) and crowds (peak tourist hours). The best times are always the edges of the day.
Bring extra battery: Taking lots of photos, especially with night mode on your phone, drains the battery quickly. Bring a portable charger (power bank) to ensure you don’t miss the golden hour due to a dead battery.
Try unusual angles: Beyond the classic spots, try lying on the grass at Champ-de-Mars, photographing reflections in puddles after the rain, or using flowers and garden vegetation as a frame in the foreground. The most memorable photos often come from perspectives that most tourists don’t try.
Solar time app: Install an app like PhotoPills or The Photographer’s Ephemeris before your trip. These apps show exactly what time sunrise, sunset, golden hour, and blue hour occur in Paris on any given date. This way, you can plan each photography session with precision.
Compact travel tripod: If you use a camera or want to take long-exposure night photos with your phone, a compact tripod (like GorillaPod models) fits easily in your backpack and opens up a world of photographic possibilities. It’s not essential for daytime photos, but it’s crucial for the best results at night.
Respect people’s space: In busy spots like Trocadéro, patiently wait for the right moment between the flow of tourists. You don’t need to ask people to move out of the frame—usually, in 30 to 60 seconds, the path clears naturally. Patience is one of the most valuable skills in travel photography.
Recommended Gear
You don’t need expensive gear to take good photos of the Eiffel Tower. The latest smartphone, used correctly, produces impressive results. But if you want to take photography seriously, a few items make a difference.
For mirrorless or DSLR cameras, a versatile zoom lens like 24-70mm (or equivalent) covers most scenarios. For photos from the tower’s floors or distant landscapes with the tower on the horizon, a telephoto lens (70-200mm) is valuable. A circular polarizing filter reduces reflections on the Seine and slightly saturates the sky’s colors during the day, improving the overall quality of landscape photos.
For smartphone users, in addition to the compact tripod mentioned, a magnetic filter adapter (like those from the Moment brand) allows you to use polarizing and ND filters even with a smartphone. A small Bluetooth remote to trigger the camera without shaking is also useful for long-exposure photos.
Summary of the Best Viewpoints
To make planning easier, here are the main photography spots with their characteristics: Trocadéro offers the classic frontal view and is ideal for golden hour and blue hour; Pont de Bir-Hakeim provides unique cinematic angles with the bridge’s structure as a compositional element; Champ-de-Mars allows for photos from base to top and people portraits; Pont d’Iéna positions the Seine in the foreground for dusk photos; Montmartre enables photos with the tower on the Parisian horizon; and the tower’s own floors offer high-angle perspectives that no one else has.
Each of these locations has its best time and ideal angle. Combining the information from this guide with careful planning of light times is the recipe for returning from Paris with Eiffel Tower photos you’ll want to show off for the rest of your life. Happy shooting and safe travels!